Thursday, May 27, 2010

In Studio Workshops

This summer, I will be teaching 2 day workshops covering the digital printing process with alternative surfaces, in my studio in Prescott, Arizona.

Three dates to choose from this summer:

June 19 and 20
July 10 and 11
August 21 and 22

There are lots of places to stay in the Prescott area.  I would be happy to help you with this.  You can contact me  with questions.

All supplies will be provided in the workshop price.

During the course of this workshop we will:
Learn the basics and information on all the pre-coats.
Prepare and print fabric and specialty paper.
Prepare and print beverage cans.
Prepare and print skins.
Prepare and print metal mesh.
Prepare and overprint a surface.
Experience the complete printing process.
Use tutorials in Photoshop and/or Photoshop Elements
Receive written instruction and suppliers for future use.

This 2 day workshop will prepare you with hands on instruction on how to get the most from
your digital prints on alternative surfaces.

Bring your laptop to work on images during the workshop.

Even without a laptop,  you can still participate in any image manipulation discussions.


I will be happy to answer any questions you have before and after the workshop.  To enroll for one of these workshops use the buy now button, below for the date of your choice.

Workshop price of $325.00 includes all materials for the workshop.
Once you enroll, you will receive  workshop details by email.
Workshop size is limited to 4 people.

June 19 and 20, 2010


July 10 and 11, 2010


August 21 and 22


Wednesday, May 26, 2010

Dyed and Painted Journal Pages


Here is a little hint on getting interesting color when painting paper or fabric.

In my art journals, overprint digitals, any type of books, I often paint watercolor paper as a base.  My favorite paper Fabriano Artistico hot press 140 lb watercolor has a scrumptious hand. Of course it is watercolor paper, but there is not a watercolor palette involved.  I use acrylic or liquid acrylic with water mixed with different colors of dye.  Type of dyes? Procion Fiber Reactive Dye in powder form from Dharma Trading Company.  Many times, it is the left over dye from other projects that is used to color the acrylics.  

Mixing dys with the acrylic paint does great thing to the colors.  The color is mixed right on the paper or fabric.  Sometimes the dyed water is lightly spilled on the paper first before adding some splashes of paint.  Other times a few dabs of acrylic will be first and a very wet brush with the dye water will spread the acrylic around.  The technique is spontaneous and quick and many sheets can be colored in a short period of time.  

Here is the workspace set up and some of the results.  These pages are for a combination fabric and watercolor paper that is currently in construction.


Wednesday, May 19, 2010

Mariposa Grove 3 Almost Ready

Today was spent reconfiguring my large piece for the opening of an exhibition on Friday night.  See yesterdays blog post for the details.  Well the piece is now almost ready, just a few things to do while it is on the wall.  Here are pics of todays progress, starting with the piece after it was taken apart and put on the floor to rearrange.


Back up with a few things to straighten fix
Detail

The drawback of  pictures is they cannot show the detail, texture or feel of this piece.
Finished size is 103" in length, 120" in width.  There are 2200 cut can pieces that
have been digitally printed.  There were 350 cans printed to create this piece.
The piece is joined with hemp and has twigs wrapped in amate bark paper on the 
center of each can piece.

Tuesday, May 18, 2010

Crazy:)


Last weekend I finished all the work for my upcoming show:
Arizona Commission on the Arts Awards: 2009 Prescott Project Grant Recipients -May 21-June 25, 2010, Yavapai College Art Gallery.

Outside my studio is a covered patio, where I assembled my Mariposa Grove 3 to see what it would look like once it was in the gallery.  I had been over the ideas for installation with the powers that be in the gallery.  To make a long story short ( and not to sound like I am complaining) it didn't work out the way it was planned, so today I took the strands apart and right now they are laying on the gallery floor till tomorrow, when I will reassemble it in another way to hang on the wall, flat and not the way it was intended.

Hopefully this will have a happy ending.  The show opens Friday night this week and after 3 months of work it would be great to hang this piece.  Stay tuned and we will see what happens.  Until then here are some pictures of the piece 10 feet long and 42 inches across the circle.


Wednesday, May 5, 2010

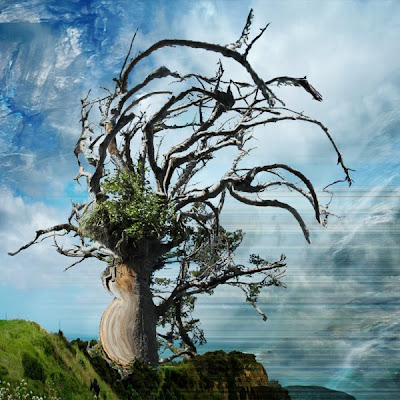
Puppet Warp-Photoshop CS5


Before


Haven't had much time lately as I am finishing my artwork for an upcoming show, but yesterday I was playing with puppet warp to take a break from construction.  Here is the before and after.  This particular feature of the new version of photoshop takes some practice and I am looking forward to doing just that.  It will open many doors for the images I will be using in upcoming work.


After
After Puppet Warp, using 3 photographs.