Friday, December 31, 2010

HAPPY NEW YEAR!!

December 31, 2010 on my deck.
This is the time for new year resolutions. I seriously consider these all the time.  I think and pile on all those things wonderful ideas about art, growth, accomplishing what I want blah blah blahI and decide what I think I should do.  This year I have some incredible ideas about learning new computer software.  Just got Corel's Painter 11 and absolutely love their brushes. Have lots more to learn in InDesign and Illustrator and a program that will allow me to create my own fonts.  I already have a schedule to write more consistently on my blogs blocked out.........and then I realize what ends up happening with all those lofty ideas.... they are made -now -today -without any thought to where I will be or how I will be feeling when I have to keep my agreement with my resolutions.  Then you know what happens?  Life gets in my way and while I am doing life, in the back of my mind I think of what I said I would do and haven't.  
I create, that's what I do and that is what I am going to keep doing everyday for this year and all the years after.  In creating there are no rules.  So here's my this new years solution resolution. For 2011- I created a treasure box.  Everyday I will make a contribution to my treasure box.  What that will be....I have no idea.....the surprise of it........that is the key.  I have no idea what will land in my treasure box day to day, but I am looking forward to the journey and that is awesome.  
For this year, remember, there are no ordinary moments.

December 31, 2010 from my studio porch.


Wednesday, December 22, 2010

Design Intriguing Surfaces in FiberArts

The new FiberArts Winter issue 2010/2011 has a blurb on my ebook-
Design Intriguing Surfaces. Page 13 at the very bottom it mentions my ebook. Thanks to FiberArts for including me!


For information on Design Intriguing Surfaces see my post in a previous blog.Design Intriguing Surfaces
- Posted using BlogPress from my iPad


Tuesday, December 21, 2010

Yosemite Renaissance XXVI

My piece Mariposa Grove has been accepted for Yosemite Renaissance XXVI at the Yosemite Gallery Museum to open on February 25, 2011.  The opening reception is 5:30 to 7:30PM.

Mariposa Grove is 36" x 17" and is a digital print taken in the Grove in 2008 on an early morning hike.  My husband and I arrived at around 7AM and and spent 3 hours hiking the grove as I took an obscene amount of pictures.  The image is altered in Photoshop and printed on a piece of my hand made amate bark paper along with a piece of copper mesh.  The prints are attached together on a piece of 1/4" hardware cloth with waxed linen thread.


"Yosemite Renaissance is an annual competition/exhibition which is intended to encourage diverse artistic interpretations of Yosemite.  Its goals are to bring together the works of serious contemporary artists that do not simply duplicate traditional representations; to establish a continuum with past generations of Yosemite artists; and to help re-establish visual art as a major interpretive medium of the landscape and a stimulus to the protection of the environment.  Historically, the arts have played a very important role in the establishment of our State and National Parks.  It is our hope that they can be just as important in future efforts to preserve and protect that heritage."   From the Yosemite Renaissance Prospectus


Saturday, December 18, 2010

Art Unraveled 2011Workshops - August 2nd and August 9

I am truly excited to be teaching at Art Unraveled again this coming year.

My workshops: Dimensional Collage with Digital Medium will take place on August 2, 2011.
Here's the class description:


All levels
Project and Process

Using digital images and dimension with collage adds depth and interest to all types of artwork.  Before coming to the workshop each participant will email me images so they can be printed on several alternative surfaces and be ready to use in your designs.  During the class you will use these images as you combine other elements for dimensional colllage.

We will create artwork that is uniquely yours.  Starting with your digital images we will
construct a collection of small compositions.  These compositions can be put into book form, or stand alone as collage pieces.  There will be instructions to accomplish the format that works for you. 

Constructing the base and working from there, our digital images and other elements will be assembled and embellished.  Participants will also receive verbal and written instructions on how to prepare fabrics in the future to print on their inkjet printers.


My workshop: Can-Can Art will take place on August 9, 2011.

Here's that class description:


All levels
Project from process

Ever thought of digitally printing on a beverage can and incorporating it into your art work?  Well here is your chance. 

This is a 2 part process/project workshop.  First will be complete instructions on how to prepare cans for successful printing, with full written instructions.  There will be a demo and hands on prep for the cans to understand how to complete this process later on your own. This will allow you to take this process home to your inkjet printer and print your own images on cans.  (You will ultimately need a straight path printer for this process.) 

As we start the next phase of the workshop, we will use the pre-printed cans from your kit to assemble your project. Making little elements and/or objects with the printed cans from your kit, we will learn the ins and outs of construction.  Follow your own inspiration, or use step by step instructions to build your creation. 

It is amazing how many ways this surface can be used to add interest to your art, mixed media work and journals.  We will explore many ideas and assemblage techniques for you to go ahead with this process.  Join us and be inspired to recycle beverage cans in a unique artsy context.  


Wednesday, December 15, 2010

Forest Book Kauri Page

Enter more to the inside of my Forest Book with a page based on the Tane Mahuta, New Zealands largest known living Kauri tree.  This tree is in the Waipoua Forest on the north island.  This forest is magnificent and the print this page is based on is but a tiny section of this immence tree that is upwards of 1200  years old.

The image is printed on these surfaces: lutradur, tyvek, rice paper and dyed canvas.  The layers also contain dyed burlap, chrocheted hemp, twigs and dyed cheesecloth. The stacks are wired together an attached to hardware cloth.  A large border of crocheted jute surrounds the tree composition.

Sunday, December 5, 2010

Mesa Contemporary Arts' 32nd Annual Contemporary Crafts Exhibition

My piece Forest Surfaces 15 will be displayed in this Mesa Contemporary Arts show from January 21, 2011 through March 6, 2011 with an opening on January 21st.  The show is curated by Perry Price, Assistant Curator of Exhibitions and Collections at the Fuller Craft Museum, Brockton, Massachusetts.  The Mesa Contemporary Arts Crafts exhibition will include 47 artworks by 37 artists representing 18 states. 


Forest Surfaces 15 Artist Statement
My visits to forests that are home to the largest trees on the planet, has been inspirational in depicting a response to this incredible environment.  Photographs of trees and their surrounding areas evolved into a series of work.
Forest Surfaces 15 is an expression of the Waipoui Forest in northern New Zealand.  An image is manipulated and printed on an alternative surface with archival ink. Visually stepping into the composition of layers inspired by the forest, hemp is crocheted for a base. The digitally printed surface is melted and torn then layered with beads for the final composition. 

Forest Surfaces 15 is 78" long and 20" wide.  


Tuesday, November 30, 2010

Forest Book Metal Mesh

Metals and metal mesh in various forms are the basis for this page in my giant Forest Book.  This page measures 4 feet heigh and 2 feet wide.  It starts with a piece of plywood, sanded, varnished and used for a base for riveting all the metals.  Tracy Moore taught me this technique at a workshop in his studio on forged metal journals.

As the page begins, I start to cut up some of the metal to start riveting pieces to the pages.  These are digital prints on recycled printers plates.

Digitally printed metals include: beverage cans, recycled printer plates, fine copper mesh, aluminum and copper screen. Most of the metals are riveted, some of the pieces are attached with waxed polyester thread.  Cord of waxed polyester thread are cut and attached to use with 3D collage.
All the surfaces have been digitally printed, most using a Clear Matte Precoat from inkAID.  Some of the mesh and metals have been cut and strung together with beads.
This detail shows recycled printers plates attached in strands and also riveted right to the page.  For more detail pictures of this page see my Kathyanne White Texture Blog.

Monday, November 22, 2010

Forest Book Amate Bark Page

This page is 48" x 24" and is several prints on paper made with the Amate Bark Process.  This is a several day process, but the results are always beautiful and full of texture.  I used Kozo Fiber from Japan.  The picture below are the 2 full panel used, you can see one has more holes in the surface then the other.

The prints are attached to a piece of wood.  Dyed cheesecloth is attached to the surface of the wood with gel medium.  The 2 larger prints are stacked and attached together with waxed linen with a large bead strung in between the panel layers.  This keeps the layers separate. The print with more holes is on top.  The edges are extended by using the smaller pieces with large beads and waxed linen


A cursory look at the process goes like this: soak the fibers overnight.  Boil the fiber and transfer it to a crock pot to simmer between 8 to 12 hours.  Layer the bark horizonally and vertically and again, depending on the thickness wanted.  Then pound together with a smooth rock and let it dry.  Coat with the inkAID precoat of choice.  Let dry again and print from a carrier sheet.

Detail pictures appear on my kathyannewhite texture blog.

Wednesday, November 17, 2010

A New Idea About Digitally Printed Alternative Surfaces

For a month I have been printing surfaces to be used in my Forest Book series.  The work for the series will push my idea and imagination on new alternative surfaces, the way these surfaces can be created and assembled.

For now I am working on studies to create large size books with the smallest page size of the smallest book to be 48"x 24". These Forest Books are based on my photography taken in the Waipoua Forest in Northern New Zealand and Mariposa Grove in Yosemite National Park.

I have finished 6 pages and have 3 more in pieces all over my studio. As I work through this idea, I will be posting images. My plan is to create a digital journal on what happens along the way, but that will evolve as this goes along. I will also be following up with details of the textures in the book on my KathyAnne White blog, where I post on texture.

This is the front of the first book with 6 pages. In the next few days, I will follow up this post with details of the pages.


- Posted using BlogPress from my iPad

Tuesday, October 26, 2010

The Complete Guide to Digital Printing and Assembling Beverage Cans

My new ebook is now available on KathyAnne Art.  Members be sure to log in first to get your 20% discount.


Introduction-

"Whether you are doing this for fun or to create interesting artwork, beverage cans are an incredible surface for digital printing.  This ebook is your action guide to everything you need to know about creating a successful digital print on a recycled beverage can.  As an added benefit, you will be able to use the techniques you learn here on other lightweight metal surfaces.  From trial and error after preparing and printing over 4000 beverage cans my process has evolved to its current state. This ebook will assist anyone at any level to be able to successfully print their own cans.  


In 2009 I was awarded an Artists Project Grant from the Arizona Commission on the Arts for my project “Expanding the Digital Print to Uncommon Surfaces.”   Since the grant period started in January 2009  I have been experimenting with and printing a multitude of substrates. One of my goals for the grant was to share what I had learned about the digital process on alternative or uncommon surfaces.  My beverage can process began with the search for interesting substrates to print and create how-to videos for youtube.  Through experimentation and research the list of my substrates continues to grow and beverage cans are one of the surfaces on which I developed tried and true techniques.   My continous search for alternative substrates still finds beverage cans as one of my favorite surfaces to print and assemble................"


To purchase this ebook download for $9.99:


Friday, October 15, 2010

New Ebook on Printing Beverage Cans Available Soon!

By the end of this month, my new ebook will be available from the KathyAnne Art Site.
This ebook will describe everything you wanted to know about creating a successful print on a recycled beverage can.  As an added benefit, you will be able to use the techniques for preparing and printing other light weight metal surfaces.  From trial and error for over a year and after preparing printing over 2000 beverage cans my process has evolved to it's current state and will assist anyone at any level to be able to successfully print their own cans.   Whether you are doing this for fun or to create interesting artwork, beverage cans are an incredible surface for digital printing.

From cans to assemblage, this ebook will have it all!

The Complete Guide to Printing then Assembling Recycled Beverage Cans

Saturday, October 9, 2010

New inkAID Videos

The inkAID site has several of my videos running on their pages. This inspired me to do some specific videos on inkAID products since they are an integral part of my work. There are more videos coming soon, but you can visit my youtube channel from time to time to see what's new. Or you could subscribe and when I post new videos you will know.

One of the surfaces I showed in the video on metals is a new one for me.  I purchased a bunch of printers plates that are turquoise. The color is a factor in the decision for the image and the coatings used.   The differences in inkAID precoats is documented in the Metals and Metal Mesh video.  Here is an example on the prints on printers plates.  You can view the video on youtube to get the whole scoop.

Monday, September 27, 2010

Photoshop Elements 9 is Here!

When Adobe brought out Photoshop Elements 9 recently they added content aware to the healing brush tool.  Content Aware is a valuable feature in Photoshop CS5.   (See my post about Content Aware Fill on Photoshop CS5 from July 20, 2010)

Content aware in Photoshop Elements 9 has been added to the spot healing brush as a default setting in the upper tool bar and works somewhat differently.  Let me show you some comparisons.


In the original photo above, I will remove the dark spots on the flower.  In Photoshop CS5 I circled all the dark spots on the flower with the lasso tool at the same time by holding the shift key to add the other small circles.  Using Edit

For the spot healing tool in Photoshop Elements 9 content aware is selected in the upper tool bar, but I had to use the brush over the spots one at a time, so they can't be done all at once.  Just takes a little more time, but the results are the same.
Now here is where it changes a bit from the 2 programs.

Starting here I want to remove the feet and the piece of garbage from the grate.  First I will show you what happened with content aware fill in Photoshop CS5
Now Photoshop Elements 9
You can see that the top part isn't too different, but the grate is not as good, so I tried again.
A little different results for this correction.

Now I want to show you something that I like to do with the Content Aware Fill. Instead of taking unwanted parts of the image out, I fill what could be called the background with the main part of the image.  This gives a different affect with the 2 programs.

 Original Image

I selected all the parts of the ground around the image and Photoshop CS5 filled it like this.

Then I did the same thing with the spot healing brush in Photoshop Elements and here it is.
You get a different interpretation of pixels.

In Photoshop CS5 you can easily select areas, my tools of choice are the lasso tool and the pen tool.
In Elements the tool is the spot healing brush and isn't quite as easy to make a selection when you want to change such as the one with the red flower.  I will be doing some tutorials on my Inside KathyAnne Art blog on this subject in the future, so check there from time to time.  


Sunday, September 26, 2010

Quilts: Masterworks from the American Folk Art Museum

On October 5, 2010 the American Folk Art Museum will open "Quilts: Masterworks from the American Folk Art Museum."  My piece Reflection will be included in this exhibition.  Reflection was added to the museum's collection in December of 2003.  

A book with the same title as the exhibition will be available from the museum store in October of 2010.


"Quilts: Masterworks from the American Folk Art Museum" launches the Year of the Quilt, the museum's celebration of a glorious American art form and the creative contributions of three centuries of talented women.  Highlighting textile masterpieces in the collection, the exhibitions include recent gifts, bedcovers that have rarely been on view, and important cornerstones of the museum's comprehensive quilt holdings. Given the rarity of the fabrics used in most of the museum's historic quilts, the fine workmanship, and the quilts' well preserved condition, it is clear that they are examples of "best" bedcovers, saved for use on special occasions or when company visited.  During the late 19th and early 20th centuries, when quilts no longer needed to be made for mere warmth, quiltmakers used the at form to express their creativity within the confines of popular decorating trends.  Most recently, contemporary fiber artists have taken the opportunity to transcend time and place, using the historical concept of a quilt as a starting point for their artistic, and often social and political, statements.

Elizabeth V. Warren, guest curator

Friday, September 17, 2010

Assembling Digital Prints on Recycled Printers Plates

The prints from last post have been altered. The back of the prints are painted with copper and black.  After painting the panels are cut in random leaf like shapes, hole punched and threaded through black 28 gauge wire.  The wire is crocheted with the pieces separated in the crochet stitches.  I crocheted a 2 foot by 4 foot piece of black and brown hemp and am layering that on top of a piece of hardware cloth.  The print pieces are going to be attached to the surface of hemp crochet along with a base of hardware cloth.

Before the pieces are attached I will frame the hardware cloth layer to give it stability.  I still don't know exactly how I will do this, but a trip to Home Depot tomorrow should help.  The section of hardware cloth must be able to stand alone and needs to be stabilized to accomplish this. When finished this piece will be one of several pages in a book that will have a cover 2 feet wide and 4 feet tall.  The giant size book is a study of pieces to come, so right now I will be solving some construction issues.  The actual covers for the book are plywood and the digital print assemblages to cover the wood are complete, but not attached.  As pieces are finished they will be posted here.

 Crochet hemp over hardware cloth
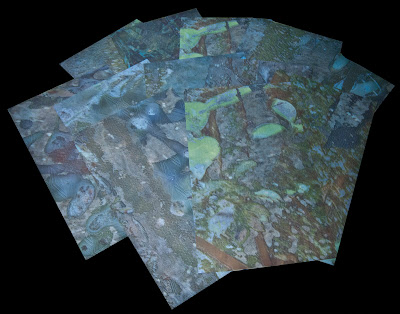
Digital prints on recycled printers plates, cut in random shapes
Detail of cut prints
Cut prints crocheted with wire on crocheted hemp and hardware cloth.