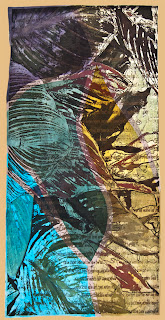
Showing posts with label digital prints on alternative surfaces. Show all posts

Monday, June 4, 2012

The Sketchbook Challenge

Well it's almost here "The Sketchbook Challenge" a book by Sue Bleiweiss.  My piece Forest Book 2 is included in this wonderful book as well as the studio journal mapping the creation of my project.  I will be excited to see the book and will probably only have to wait a few more days for my copy. 

There is some exciting news since there will be a blog hop among the artists (this includes me) who have work in Sue's book. The blog hop celebration starts June 25th and ends July 10th.  There are $1200 worth of prizes that will be given away from the artists participating.  Winners will be drawn randomly from comments on the posts during the blog hop.  Each artist will chose people from their comments for the prizes they will give away.  For more information see Sue's blog post today.

My piece is of course composed of many digital prints and then assembled on 6 pages 10" x 12" to complete the Forest Book.  Each page is a separate creation containing digital prints on surfaces such as lutradur, metal printers plates, watercolor paper, beverage cans and more.  Encaustic and crochet  is used as well as other techniques in the assemblages of the pages.    More to come as we gear up for the blog hop.

Oh and before I forget I will be giving away a  years membership to KathyAnne Art, my member website.  The value of this is $35.00, but the beauty of it is the over 700 royalty free images and the monthly workshops that currently total over 40 with new ones every month.  Remember to visit here on June 27th and comment on my post to get your chance to win.  The winner will be drawn from the comments on the blog post from the blog hop.

Also I will have a free coupon code for the workshop on my KathyAnne Art site that was created based on my studio journal seen in the Sketchbook Challenge book.  Anyone who reads my blog that day will be able to find that coupon code from a url I will post and then download and enjoy their free workshop.  You can access the workshop description for "Studio Journals Mini Workshop" on my Inside KathyAnne Art Blog.

I also have another give away- Making Handmade Books: 100+ Bindings, Structures & Forms by Alisa Golden Total retail value $19.95!  

Be sure to join all of us as we celebrate the release of Sue's book!
Forest Book 2  Front and Back Cover

Detail shots below


Thursday, January 26, 2012

Getting Started with Digital Printing Alternative Surfaces

In Studio Workshop set for April 28 and 29, 2012

For all of you who want to learn to print on digital alternative surfaces.  

Getting Started with Digital Printing Alternative Surfaces
April 28-29, 2012
9AM to 4PM each day
Kathyanne Art Studio
930 S. Cowboy Springs Trl.
Prescott, AZ  86305

My In-Studio Workshops have a 4 person limit.
Workshop Description:
This workshop will focus on printing alternative surfaces.  Where digital printing is concerned my goal is to discover the possibilities between the surface created, the inkAID precoat used and the printer capabilities.  One of the goals of this workshop will to be experiment and build surfaces that will take us into the basic new ideas of digital printing.   We will use an Epson Stylus Photo R3000 for most of the printing.  This will be hands on experience with Epson printersWe will also create a couple of surfaces to print on the Epson 1100 Workforce for hands on experience with a straight pass through non art printer.

We will prepare and print metal mesh and beverage cans along with fabrics and surfaces we build from scratch.  Students will get a well-rounded look at the digital printing process with alternative surfaces.  At the same time preprinted surfaces will be available for students to use to get an idea of innovative ways to assemble digital prints and create studies for future projects.  I have supplies and tools for us to experiment with assembling metals.  
A laptop will be helpful. Images may need to be altered to fit the size and the look of your surface.  When building surfaces we may paint, dye or add elements that will easily be seen in the final print.  In this case students will create an image file that reflects the look of the prepared surface.  We can scan and/or photograph your surface to get a better idea of the effect the prepared surface will create.  I will have jump drives to move and load images for printing.  
Bring lunch since there is no place near to get something to eat.  I have water, diet soft drinks and ice tea and will have some snacks.  There are a few errors in some of the gps tracking for directions.  Let me know where you are driving from, so I can give you correct directions.  
This studio is in a rural area on a dirt road.  I do have animals around including a cat in case you are allergic.  
Be sure to wear comfortable clothes that won't matter if you get some type of product on them.  If you want to wear gloves while painting or applying products please bring them.
Come with your imagination, questions, ideas and desire to explore.  We will deal in what if's while we create surfaces that safely print on my printers.  Any questions or registration contact me.


Saturday, January 14, 2012

Spontaneous Creating


This morning I was on the way to my studio just wanting to create something. (Okay so it is only at the bottom of a set of stairs, but I knew something had to happen since I was feeling so inspired to go forward with an idea.)  Right now I am in the midst of many amazing projects, writing an ebook, doing workshop prep, a keynote to polish, an enews to write and a workshop of the month to finish for KathyAnne Art members.  Plus I am in the process of working on 2 art pieces simultaneously one for our 8 that create group and one for a refuse show.  
So what am I doing today?  Creating without regard to what deadlines are looming.  That is one of the things I love the best.  This is also a refuse piece that is calling me, so I can’t stop myself.  Have to go with the flow on this one and what a great morning it was with most of the elements ready to construct this piece.  
Here is the start of the set up and then I will have to see what other parts will be needed to assemble the piece.  Only a few more elements to get this to go together.  

My first inspiration was to go for the bottle caps.  Then I went for a rectangular box shape that is 6" x 6" x 10". 

This rectangular hardware cloth piece was put together a few months ago and not used.
Next I knew I wanted to fill the bottle caps with layers of something and the total layer thing wasn't clear yet, so I started with beverage can prints.
I tested some beverage cans to stamp into circles and found the size I wanted.  I then proceeded to cut enough circles with a smaller size circle to layer over the large one.   
I know what's next- this print will be torn small to fold over the edges of the bottle tops with 2 layers of beverage can circles and maybe beads.  I will try a study of a few caps later today or tomorrow.

Wednesday, July 20, 2011

Digital Print on Pieced Silk


After I posted last month’s mini workshop for members Digital Printing Silk Surfaces, I went back through my photographs to write exactly what I did to create the 24” x 48” panel of pieced silk.  When I started to prepare surfaces to print, I had one of those "what if?" moments.  My imagination is drawing me forward to experiment widely with the printed surface.  On this particular path my inspiration was to create a silk surface that combined many pieces of silk into one print.  Now- how do I do this and further more, how do I do this and not get it stuck in my printer?
With my Epson 7890 I am pretty careful about my approach and the surfaces I print.  Wanting to print a heavy weight silk in a 24" x 48" size has it's own intricate parameters.  Using many pieces of silk put together there were many ideas to consider.  
The silk fabric had to be flat and stay on the carrier sheet.  Sometimes when fabric is printing the wetness of the ink will make the fabric lift and bunch toward the end.  Two things could happen there, the printer may quit printing because it senses something is not right, or it could jam.  Believe me I would way rather have the printer stop printing than jam!  This meant I wanted to printing to go amazingly well.  So here are the decisions I made to create my study.
* I laid out several pieces of silk and free cut them just like I used to do for my spontaneous pieced art quilts.  
* Cutting the pieces to fit together I then used inkAID Clear Semi Gloss precoat to coat the surface of each piece.  
* Once the piece dried, they had changed shape quite a bit and had to be recut.  They did however stay flat as I pressed them from the back side before cutting.  
*My aim all along was to get a amazingly flat surface, so the printer would not have any trouble.  My 7890 is a brilliant machine and it would be wonderful if it lasted a really truly long time:)
* Once the silk was recut, I used a cloth tape to attach the pieces together and coated just the tape this time with the same precoat I used on the fabric.
*The cloth tape had some little darts that were created as the tape curved.  I pressed those down and got the tape flat when I ironed the piece while the tape was still slightly wet. 
*Then wondering if the tape edges would lift, I stitched all edges with a clear thread.  
*Leaving nothing to chance I then attached the silk surface to a carrier sheet. First with applying Spray Photo Mount to the back of the print- I also ran double faced scotch tape along the tape on the backside.  Plus before I taped the edges with masking tape to hold the surface firm for printing, I used some double faced scotch tape on the edges where they were a little rippled and didn't lay exactly flat.  
One more thing before the print could be put into the printer.  The image file had to be manipulated.  I took a picture of the surface, transferred it into my computer, opened it in Photoshop and it became the base of the image I was designing.  I wanted to use text, so I used text that I had typed from the Thesaurus that came from words that had to do with forests, trees and the like.  I pulled the text into another layer on top of the background and took pieces of other image to overprint on the design. Before the image was printed I turned off the layer of the color of silk, so that wouldn't print.  Once it was printed my plan is to print other surfaces with the color of silk layer and create a cheesecloth skin and some metal pieces to build a textural piece from the texture.  
Print on carrier sheet
Final print

Tuesday, June 28, 2011

Digital Printing Expanded

Imagining more to expand digital printing I found this kind of brass colored screen last week.  My favorite is still copper, but this is pretty neat stuff.  We'll be printing this in the workshop coming up in my studio "Not Just Digital Printing".

Couple of new printers plates printed


and some collaged silk.
Silk on carrier sheet.

Finished print


Printed the printer plates and collaged silk surface while working on my new mini workshop for members of KathyAnneArt, "Digital Printing on Silk Surfaces.

Next is building paper surfaces by layering, not sure where that will go.  I want some new tested surfaces before my digital printing workshop in July where we will get some radical new surfaces created.


Sunday, January 16, 2011

ARTFEST 2011 Workshops

One of the exciting workshops I will be teaching at ARTFEST 2011 in April this year is on the 8th entitled “Layered 3-D Collage”.  This interesting workshop is based on building textures and dimension.  Techniques from this workshop are just the start of an infinite amount of ways to build interest in your art.  The workshop incorporates little challenges where I will supply students with items to stimulate a unique 3-D element.  We will also make a 3-D artist card including what is designed in the workshop.  Imagination and risk will play a role in this unique workshop. 
I encourage you to bring any found or dimensional object to this workshop to incorporate in a design.

There are plenty of designs on my texture blog and all over the web that include my 3-D and textural work. Here a few little pics to add to those:)

Passing on what I have learned with digital printing is something near and dear to my heart.  At ARTFEST 2011, I will be teaching “Printing Alternative Surfaces”  in which we will discover how to digitally print on surfaces other then the norm of photo paper.  The surfaces chosen for this workshop give a wide range of what can be printed and will add texture to the prints.  Any question you have ever had about digital printing on fabrics and specialty surfaces will be covered and my aim is for everyone in the workshop to go home feeling confident about printing on their own. 
There are only 3 spaces left in “Printing Alternative Surfaces” on April 7, at ARTFEST, so if you are interested make sure you sign up soon.  Here are a few Southwest style images to be printed on the various surfaces we will use in the workshop.

youtube videos on these workshops:


Wednesday, December 15, 2010

Forest Book Kauri Page

Enter more to the inside of my Forest Book with a page based on the Tane Mahuta, New Zealands largest known living Kauri tree.  This tree is in the Waipoua Forest on the north island.  This forest is magnificent and the print this page is based on is but a tiny section of this immence tree that is upwards of 1200  years old.

The image is printed on these surfaces: lutradur, tyvek, rice paper and dyed canvas.  The layers also contain dyed burlap, chrocheted hemp, twigs and dyed cheesecloth. The stacks are wired together an attached to hardware cloth.  A large border of crocheted jute surrounds the tree composition.

Monday, July 19, 2010

Flickr Group for Digital Alternative Surfaces

Amazing digital surfaces are the central theme of my new group on Flickr-Digital Prints on Alternative Surfaces.  I would love to see what you are printing on.   Printed alternative surfaces are interesting, innovative and inspirational.  Here is a place to share what you have created in this genre.  You can access this group and get permission to join by going to http://www.flickr.com/groups/alternative_surfaces/
Photos and posts can be anything concerning digital printing: an idea you are working on, a print on an uncommon surface, or a finished piece that incorporates digital prints on alternative surfaces.  This is the place to post your photos or join a discussions.

Join us to share inspiration, ideas and projects with digital prints.
You will need a Flickr account to post.  Also I will have to approve you. You can go to this url  or you can contact me and request an invitation to Digital Prints on Alternative Surfaces on Flickr.   Then you can start a discussion, add to a discussion, ask questions etc.  The best part is for you to share your digital creations in any form and let us all view them.   If you are looking for feedback this is a great place to ask for it.  We would love to have you as a group member.  

Recycled Beverage cans, assembled in layers of printed cans and crochet wire
 Digital print on copper mesh
Digital print on organdy, painted canvas and lutradur
Digital print on aluminum flashing with molding paste and sand added before the inkAID precoat for printing.

Wednesday, June 23, 2010

Digital Prints on Alternative Surfaces:Skins and Metal Mesh


My online workshop Digital Prints on Alternative Surfaces:Skins and Metal Mesh has been posted to  KathyAnne Art.  If you are a member of KathyAnne Art be sure to log in to be sure to get  your 20% discount on the workshop.

Using skins, creating texture with them, embedding other elements, using them in 3D compositions, these things appeal to me.  As long as the surface fits  through my printer, there are unlimited constructions ideas open to this alternative surface. In this workshop we will explore the basics, look at some of the ideas about building skins and learn how to print them successfully.

Metal mesh, the other subject of this workshop, creates an incredible surfaces. This surface will have the texture of the mesh as underlying interest.  Metal is an interesting surface to print. When the metal is a mesh it is pliable and alluring.  


Join me on this look at creating alternative surfaces with skins and metal mesh.  This workshop has a video that can be downloaded to your computer when you view it.  It also has a PDF Workbook that you can download, with pictures, descriptions, step by step for both skins and mesh, list of supplies and other thoughts and hints about these  
intriguing surfaces.  


Video access never expires, so as long as you keep the information on passwords and url of the video, you will be able to view it as long as you wish. Feel free to email me with questions at any time. 


Once you learn the techniques you will find what works for you, what you like or not and you can tailor make your surfaces to fit your work.  

The workshop workbook contains descriptions of the inkAID precoats, suitable for this process, along with other information on resourses.

Watch my youtube introduction video to view some of the printed surfaces.

You can also view the video on my Inside KathyAnne Art  blog

The cost of the workshop for non-members is $50.


Remember members get 20% off when they log in before they purchase the workshop.
Member Login

Wednesday, February 17, 2010

Polymer Clay Journal Covers


Book of Forests 6 was completed at the end of January during Winter Play in Port Townsend Washington. Teesha and Tracy Moore were the hosts for this incredible weekend.  Lots of time to concentrate and create as well as enjoy the other participants.  My focus was to use the polymer clay covers for my latest art book - Book of Forests 6.   To the left above, you see the front and back covers.  The darker is the front and composed of polymer clay, that has embedded wire mesh on the surface.  Holes are drilled for other elements to be attached with wires.

Detail

This book is composed of a multitude of digitally printed surfaces that have been assemble to make up the pages.
Printed lace paper with printed canvas accents.
Printed lace paper, printed vellum, wire mesh,
printed canvas, beads.
Printed cheesecloth skins, printed lutradur, printed watercolor paper.

Printed vellum, collaged and printed watercolor paper, crocheted hemp, printed beverage can, wire and beads.
Printed copper and bronze mesh with brass wire

Printed aluminum screen, beads, wrapped ring.

Top view of Book of Forests 6.  Pages are around 5" x 5".  These book pages will be included in my ebook in progress "Assemble Intriguing Surfaces"  Hopefully the book will be available in April.  
"Assemble Intriguing Surfaces" will document how many of my assemblages are created with lots of visuals and creative ideas.