Thursday, March 31, 2011

Beverage Can Prints

Crazy busy in my studio and at least I am getting to some of my serious printing tasks.  Since I am gearing up for vending night at ARTFEST 2011 (wow is it really next week?) I have been doing some printing.  First some cheesecloth skins on my new 7890.  Those are already packed so you won't be seeing those, but these can prints are in the drying process and on their way to be varnished.  Loving our weather in Northern Arizona, my drying time is sweet.  I will be printing some more cheesecloth skins this weekend, since that will be about all the time left before finishing packing.  LOTS of stuff to get ready before my 2 workshops and vending night.  It's always so wonderful when you get there and it all comes together.

 Beverage Cans in mid process.  Varnishing next.

Details

Check out my ebook to learn about printing on beverage cans.  Amazon Kindle-"The Complete Guide to Digital Printing and Assembling Beverage Cans"

Saturday, March 19, 2011

Epson 7890

Well is just had to bite the bullet and purchase a new printer.  There were several problems that needed service with my 4800 and it wasn't worth repairing it, so I bought the 7890.  It's an awesome printer, but a little bit of a learning curve is appearing.  The other thing is that it loves to suck the ink to get set up, or clean nozzles or whatever it thinks it should be doing.  It is not as easy to fool as my last printer with paper or sizes or anything and tomorrow I will start printing some cheesecloth skins, so I will learn how to use this printer with carrier sheets etc.

The color is beautiful and now I can print 24" wide which in the case of my new large book pages is a fabulous thing.  This afternoon I am printing silk 17" wide prepared for printing.  Think this is the last of my 17" fabric and then I will be precoating lutradur and heavy weight canvas to get my printer profiles down with those surfaces and also some recycled printers plates.  Hopefully by the end of my planned printing I will feel a little more comfortable with this printer.

Monday, March 14, 2011

Digital Printing Workshops for 2012

In 2012 I will be teaching 2 amazing digital printing workshops.  One in February in Texas and one in July in Greenville New York.


Fiberwerkes 2012
Texas Federation of Fiber Artists
Kerrville, Texas
February 24 - 26, 2012

Digital Prints on Alternative Surfaces


This workshop is designed to be your complete guide to digital printing on alternative surfaces.  We will prepare and print fabric, specialty paper, substrates we build ourselves, beverage cans and metal mesh.  Whether you are new to this idea of familiar with printing on fabrics, this worksop is jam packed with information on the subject.


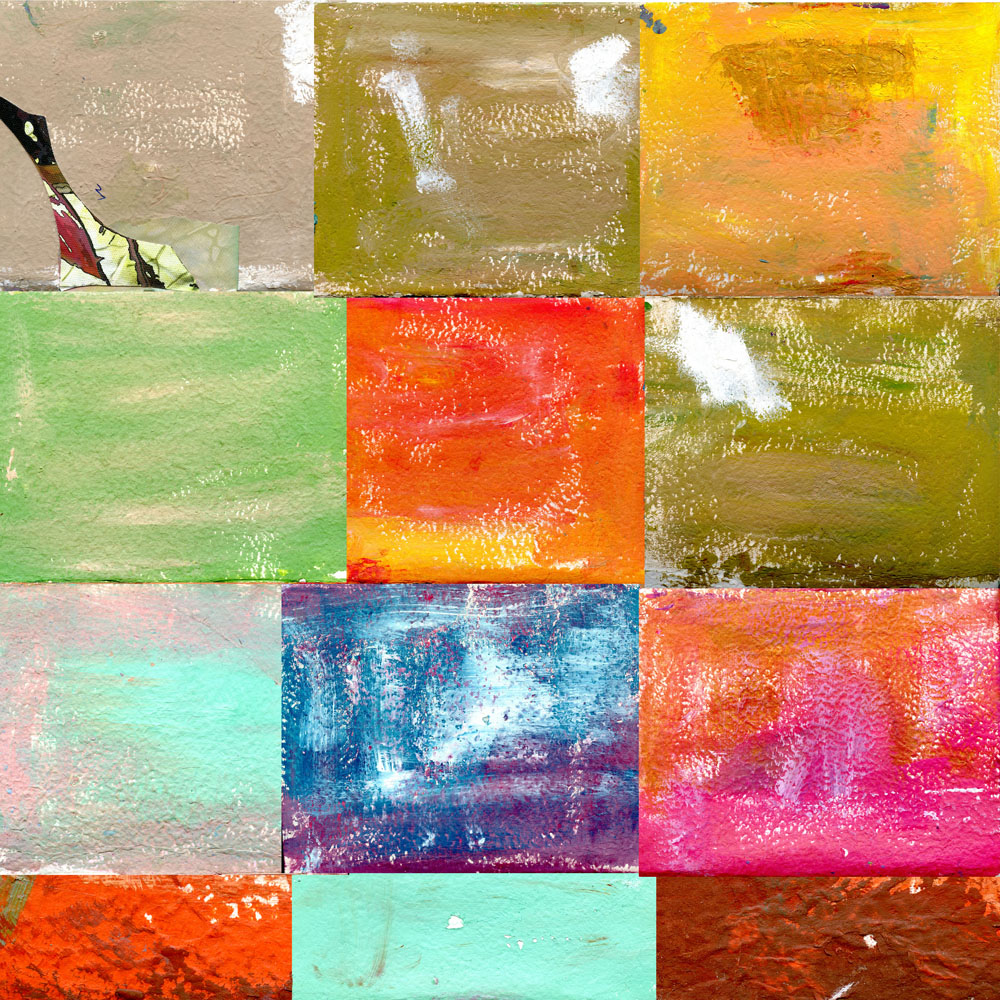
For a better understanding of precoats and how they react with different substrates, it is recommended you use one image throughout the workshop.  Images that works best are all over prints without strong dividing lines for example a floral scene usually works well.  


There is a class fee for and a supply list for students.


Hudson River Valley Art Workshops
Greenville New York (at the amazing Greenville Arms)
July 1 - 7, 2011

Digital Printing Alternative Surfaces and Beyond.


This workshop will teach you everything you need to know about digital printing on alternative surfaces.  Starting with specialty paper and fabrics and beyond.  During the 5 days with this subject you will be amazed at what is created.

Techniques such as overprinting, adding elements to a surface before printing, light weight metal mesh, beverage cans and handmade substrates will give students ways to start experimenting and printing alternative surfaces successfully during and after the workshop. 

Photoshop or Photoshop Elements (in the current version at the time) will be used for any instruction on working with and printing digital images. There will be information and ideas for image manipulation, correcting color, resizing an image and the proper way to print successfully using printer profiles.

Before the close of this workshop we will experiment with assembling digital surfaces.  This will be comparable to doing studies with the prints you created in the workshop.  There is no end to the amazing ways we can work with digital prints.  You will get ideas and learn ways to successfully use digital prints to add elements to you artwork.   Consider the prints you will create during the workshop accordingly.  If you have a specific idea you would like to test, bring the supplies for that.  I will bring a stash of items for students to play with.  I will be happy to speak with individual students before the workshop to help clarify this idea and assist each student to arrive fully prepared.

If you have never been to Hudson River Valley Workshops before you will be amazed at the facility. The classroom is always open, so if you want to work other then workshop times you are welcome to.  At least one evening we work with Photoshop ideas and shortcuts. 

I am looking forward to an incredible week for students to learn about expanding the digital print and assembling your results. Whether you are a fiber artist or a mixed media artist this class will enable you to add digital elements to your work. Techniques will be taught on innovative ways to use your printed alternative surfaces in your artwork. 

Join us for a week to push the envelope with digital prints and your art.


Friday, March 11, 2011

The Sketchbook Challenge


The Sketchbook Challenge, have you heard about it, are you participating, are you curious?  In January Sue Bleiweiss started this amazing group of artists to participate with her on a wonderful idea.  Who of our creative selves doesn't at least think of sketchbooks and journals. even if we don't keep them ourselves.  Well here's your chance. Start any time and get behind the monthly theme.  March's theme is Spilling Over.  I love this theme, my sketchbooks and journals never stay in their pages.  If you check the blog today, you will see that I am the guest blogger, check it out.  I was thrilled when Sue asked me to participate.  

There are sketchbooks and journals laying around all over my studio and house.  Never know what I may want to pick up play with. I work on many at one time and am always creating them new when I am procrastinating or looking for something to do.  One thing I know is that they have to have color, pictures, texture, layers and covers with dimension.  Below I put together some images with the must have for all my sketchbooks/journals.  Colored pages either dyed or painted, some type of dimensional collage or elements, definitely some digitals and anything else that calls to me. 


Tuesday, March 8, 2011

Phoenix Airport Museum Art Collection

The Phoenix Airport Museum has included my work Forest Trail 4 and Forest Trail 6 in their museum collection. Both of these pieces from my Sensual Surfaces Series were exhibited in "Fiber Art Unraveled: Material and Process".


                        Forest Trail 4                                                                        


Forest Trail 6


"In the heart of Phoenix is one of the largest airport museums in the nation.  The Phoenix Airport Museum is spread out in six buildings at three airports.  It has a collection of more than 500 works of art with gallery spaces for exhibitions."

Art Museum Mission Statement-Through the art collection, exhibitions and aviation archive, the Phoenix Airport Museum's mission is to enhance the public's experience by creating memorable environments in the airport system that promote Arizona's unique artistic and cultural heritage.


Thursday, February 24, 2011

Bordering the Ridiculous

In the process of finishing the last 2 pages in my first Forest Book in a series.  There will be 10  total- 2 feet by 4 feet pages.  Once these last 2 are complete, the book pages will be attached to the metal spine.  This would be really exciting except that it will still take quite awhile.  The labor for this page is pretty time intensive. The hardware cloth in the frame for these last 2 pages has to be worked side to side in stages so as not to ruin the assemblage being constructed on the opposite side. As the pages are worked on, the work is juggled side to side for the correct time to put pieces together.

The part being constructed below needs one 8" piece of jute twine in each 1/4" square of the grid that is open.  The twine is pulled through, doubled over and tied close to the grid. The composition in the center is also being built up with layers of melted and torn lutradur that will attach to the top of the cheesecloth skin digital print.  Before the lutradur goes together the jute has to be completely attached to the grid.  It took 2 hours to do the small section in the left bottom corner that is finished.  I'll be here awhile:)

The crochet grid pattern you see in the background of the frame is the back side of this page.  The crochet grid will be the bottom layer of an assemblage using digitally printed tyvek, metal grid and waxed linen.  Some other elements are also being considered.

Sunday, February 13, 2011

Dimensional Collage With Digital Prints in WOW's March Issue 2011

"Dimensional Collage With Digital Prints" is my new workshop/article written for Workshop on the Web.  This article will appear in the March 2011 issue of this interesting internet publication.

My artwork including journals and art books incorporate original digital images with many textures and other mixed medium elements.  Digital media can be used in many uncommon ways with alternative ways.  This concept drives my work.  For this workshop/article my focus is on simple ways to include digital prints in mixed media art.  I chose a base of watercolor paper that can be printed on any digital printer with no precoat.  This makes the process fun and simple. The dimensional parts come from other added elements seen in the article.

Here are a couple pics-for the complete worshop/article visit Maggie Grey's Workshop on the Web to subscribe.

Wednesday, February 9, 2011

Forest Book Lutradur and Encaustic Page

Another page is ready for my Forest Book and it is composed of paper clay, encaustic, waxed linen, digitally printed and melted lutradur, dyed burlap, threads and pieces of a multitude of digital prints on alternative surfaces.  This page measures approximately 4 feet x 2 feet.  The back side will be posted here soon.  I have included a full shot and detail.  If you would like to see some other pictures of the base and the start of adding encaustic pieces go to my texture blog.


Monday, January 31, 2011

Reconstructing Mariposa Grove 3

My process of art is ever evolving. Taking this piece, Mariposa Grove 3, from where it was to where I want it to be was the focus of my weekend.  The untangling and repositioning will probably take another day or so, but here is the first section ready to hang.  The other part will be the same size as this one and is being finished.  It is now manageable to ship and show.

Before the changes, it would take me to set it up each time, this new configuration takes care of the problems.  (For the first configuration see my post of May 18, 2010 for the second see my post of May 19, 2010)   What I did was place the piece on one of my 4ft  x 8 ft tables with the back side up.  Once the section was straightened and untangled, I used jute twine to attach all the single columns.  It created a stability in the piece.  Here are some pics, my studio ceiling is not tall enough to hang the piece without the bottom touching the floor.  Next week I will hang the piece outside for proper pictures.


Sunday, January 16, 2011

ARTFEST 2011 Workshops

One of the exciting workshops I will be teaching at ARTFEST 2011 in April this year is on the 8th entitled “Layered 3-D Collage”.  This interesting workshop is based on building textures and dimension.  Techniques from this workshop are just the start of an infinite amount of ways to build interest in your art.  The workshop incorporates little challenges where I will supply students with items to stimulate a unique 3-D element.  We will also make a 3-D artist card including what is designed in the workshop.  Imagination and risk will play a role in this unique workshop. 
I encourage you to bring any found or dimensional object to this workshop to incorporate in a design.

There are plenty of designs on my texture blog and all over the web that include my 3-D and textural work. Here a few little pics to add to those:)

Passing on what I have learned with digital printing is something near and dear to my heart.  At ARTFEST 2011, I will be teaching “Printing Alternative Surfaces”  in which we will discover how to digitally print on surfaces other then the norm of photo paper.  The surfaces chosen for this workshop give a wide range of what can be printed and will add texture to the prints.  Any question you have ever had about digital printing on fabrics and specialty surfaces will be covered and my aim is for everyone in the workshop to go home feeling confident about printing on their own. 
There are only 3 spaces left in “Printing Alternative Surfaces” on April 7, at ARTFEST, so if you are interested make sure you sign up soon.  Here are a few Southwest style images to be printed on the various surfaces we will use in the workshop.

youtube videos on these workshops: